2.25″ Button Maker Kit: 500 Supplies for DIY Pins
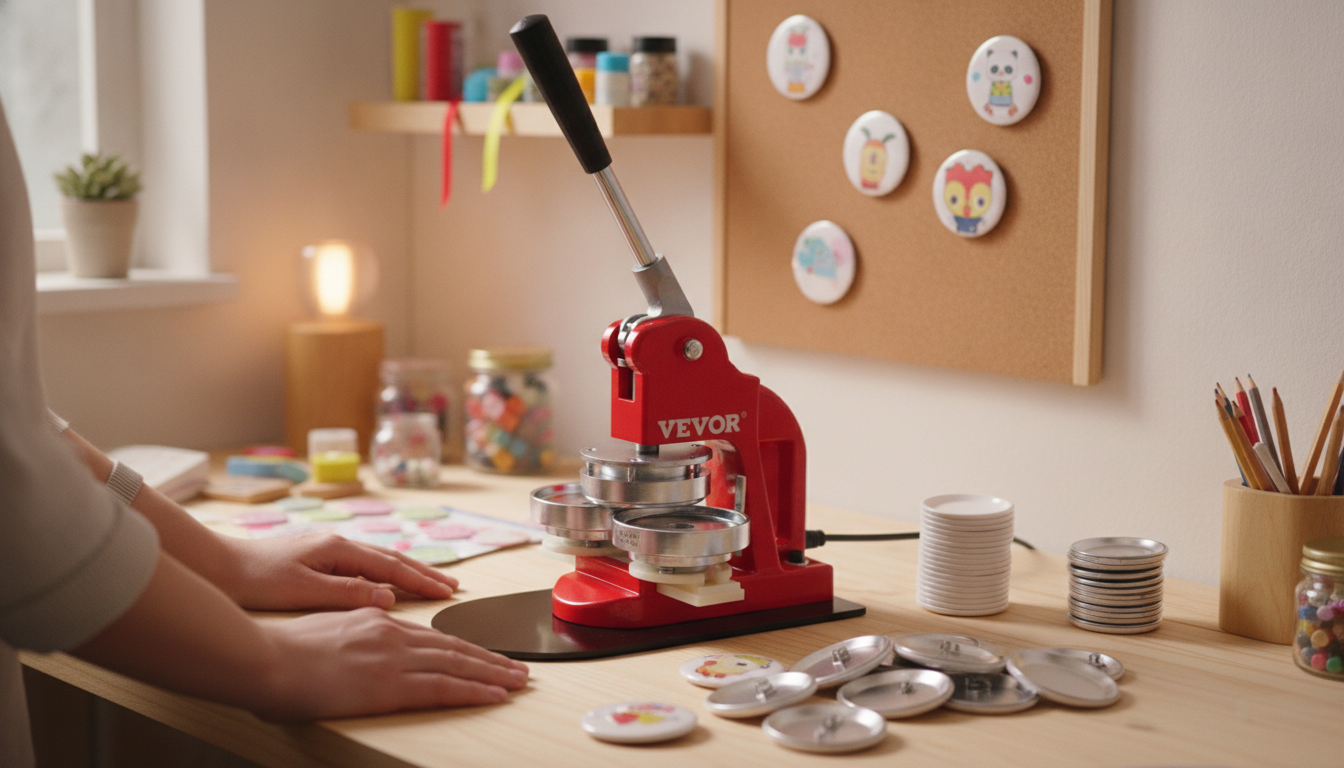
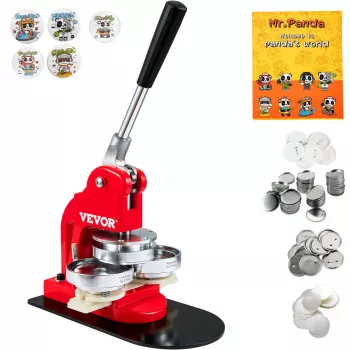
Button Maker Machine 2.25″ Badge Press Kit with 500pcs Supplies for DIY Pins
A 2.25-inch badge press kit makes it easy to turn artwork, logos, and messages into durable pin-back buttons for events, clubs, classrooms, and small-batch merch. The 2.25″ format is one of the most recognized “classic” pin sizes, offering strong visibility without feeling bulky on a shirt, jacket, tote, or lanyard. If you’re new to button making, a complete press-and-supplies bundle streamlines the process so you can focus on design, alignment, and consistent output. For more guidance, see Button Makers | Flower Mound, TX – Official Website.
For background on how pin-back buttons are used across campaigns and organizations, see the overviews at Wikipedia: Button (pin) and Wikipedia: Pin-back buttons.
What the 2.25-inch size is best for
The 2.25″ button hits a sweet spot: large enough to read at arm’s length, but still comfortable to wear for hours.
- Campaigns and conferences: A highly visible size that stands out in photos and crowds.
- School spirit and clubs: Enough room for a mascot plus a short slogan without looking cramped.
- Merch tables and pop-ups: A simple add-on item with strong impulse appeal—easy for customers to grab at checkout.
- Name tags and role labels: Works well for “hello my name is” styles and quick identifiers like “Volunteer,” “Staff,” or “Speaker.”
What’s included in a 500-piece button supply kit
Most 2.25″ button systems use a three-part hardware stack plus your printed insert. A 500-piece supply bundle is especially useful when multiple people are producing buttons (classrooms, clubs, multi-day events) or when you want repeatable batches for consistent branding.
Plan a small buffer for setup: test presses help confirm circle size, centering, and pressure before you commit to a large run.
Common components and what each part does
| Component | Purpose | Practical tip |
|---|---|---|
| Metal shell/front | Forms the button face and rim | Keep surfaces clean to prevent dents and scratches |
| Clear cover (mylar) | Protects artwork from scuffs and light moisture | Cut clean circles so edges don’t wrinkle under the crimp |
| Pin-back | Provides fastening hardware on the reverse | Check pin orientation before pressing to keep the pin level |
| Printed circle | Your design, photo, or text | Use heavier paper for crisp color; avoid overly thick cardstock unless the press supports it |
How to make clean, consistent buttons
Button making is mostly about repeatability. Once your cutting and alignment are dialed in, you can produce neat, professional-looking buttons quickly.
- Use the correct circle size: Pair your 2.25″ parts with a matching circle cutter or template. Even slight oversizing can cause ripples at the rim.
- Respect safe margins: Keep critical text, faces, and logos away from the outer edge so they don’t get pulled into the crimp area.
- Layer in the right order: Assemble shell + artwork + clear cover first, then mate that assembly with the pin-back during the second step.
- Press smoothly and completely: A steady, full press cycle helps prevent partial crimps, loose backs, and edge buckling.
- Batch your workflow: Cut all circles first, then assemble, then press—this keeps your output consistent and reduces mistakes.
If multiple people are working the station, assign roles (cutting, assembly, pressing) and keep a small “sample board” of approved buttons on the table so everyone can compare finish quality at a glance.
Design tips that look good at 2.25 inches
At 2.25″, small details can still work, but bold design choices read best in real-world settings like hallways, gymnasiums, and vendor floors.
- Go high-contrast: Strong color contrast and clear shapes stay readable from a distance.
- Keep text short: Aim for one main message rather than several lines of small type.
- Outline light text: A thick outline helps white or pastel lettering stand out on busy backgrounds.
- Center faces in photos: Avoid cropping close to the rim where the crimp can slightly distort the outer edge of the image.
- Create a series: Keep the same border and swap the center text—great for teams, club roles, fundraiser tiers, or collectible sets.
Common issues and quick fixes
Good use cases: schools, events, and small merch runs
Button Maker Machine 2.25″ Badge Press Kit (500pcs)
If you want a ready-to-run setup for 2.25″ pins with a large starter supply, the Button Maker Machine 2.25″ Badge Press Kit with 500pcs Supplies for DIY Pins is built for repeated batches—ideal for clubs, classrooms, team events, and small merch production. Pair it with a matching circle cutter and a simple template system to speed up cutting and placement.
At-a-glance details
| Item | Detail |
|---|---|
| Product | Button Maker Machine 2.25″ Badge Press Kit with 500pcs Supplies for DIY Pins |
| Size | 2.25 inch buttons |
| Availability | In stock |
| Price | $136.17 USD |
Other in-stock picks
- 66ft Drain Cleaning Cable
- Remote Control Manta Ray Shark Toy – 2.4G RC Electric Water Animal for Kids
FAQ
What paper works best for 2.25-inch buttons?
Standard printer paper works well, and slightly heavier paper can produce sharper color and a more premium feel. Avoid very thick cardstock unless your parts and press are designed for it, and keep important text inside safe margins so it doesn’t get pulled into the crimp.
Why are my buttons wrinkling around the edge?
Wrinkles typically come from circles cut too large, uneven cutting, off-center placement, or an incomplete press cycle. Use a proper 2.25″ circle cutter or template, recheck centering before pressing, and make sure each press is smooth and fully completed.
How many finished buttons can 500 pieces make?
A finished button generally uses one of each component set (shell/front, clear cover, and pin-back), plus your printed insert. In practice, reserve a small number for test presses and calibration, so the final yield is often slightly less than the theoretical maximum.






Leave a comment